 |
| Photo taken with natural light, position in front of a window. |
The other day, Jess asked if I would take over her blog for a day. Little did she know that I would post a scary self-portrait [insert evil laugh]. Actually, she said I could talk about anything under the sun...and for some reason, I immediately started thinking about catchlights.
What are catchlights you might ask?
The Digital Photography School describes them as, "the highlight of a light source reflected off
the surface of the eye. This highlight adds depth and dimension to the
eye, and gives the eyes life in a portrait or snapshot." I might also add that catchlights come in a variety of shapes and sizes depending on the light source. However, you'll want to avoid what I call "pinlights," which are the tiny balls of light you sometimes see in a person/animal's eyes when you use your on-board flash. For example, look at this picture of Kitty Paw before I knew how to properly use flash:
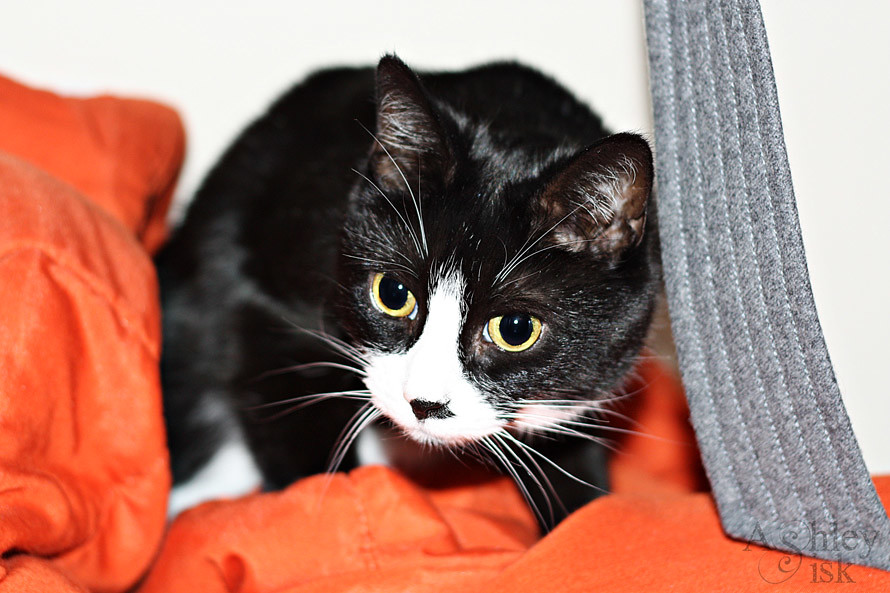 |
| Photo taken with on-board flash pointed directly at Kitty Paw. |
A year later, I took almost the same shot using my Canon 430 EX II External Flash pointed at a 45 degree angle aimed behind me towards a white wall. I basically used a technique called flash bouncing that creates beautiful catchlights even in the absence of natural light. If you want to know more about this technique, check out this tutorial by my friend Amy: Click
HERE.
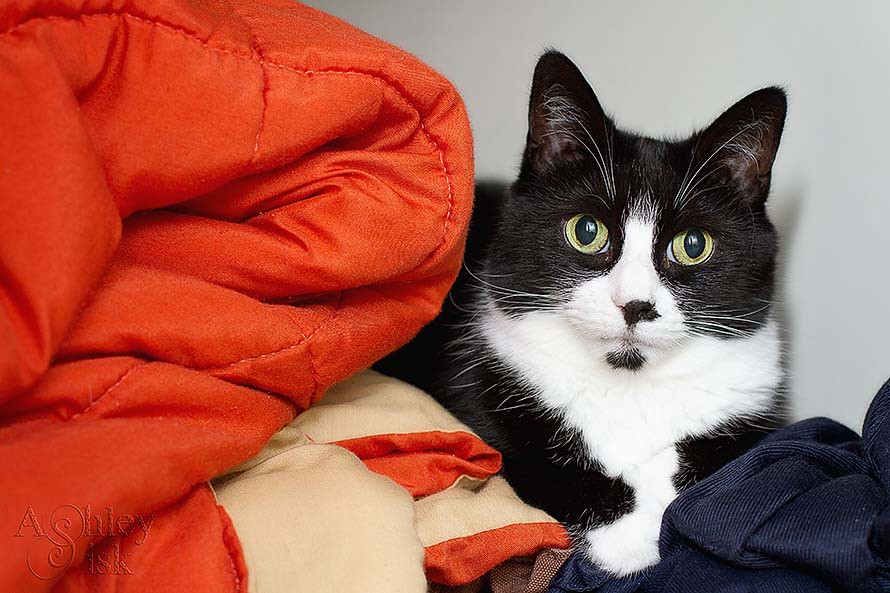 |
| Photo taken using external flash pointed at 45 degree angle backwards. |
So, now that you know what to look for, how do you create it?
- Identify your light source. Where is your light coming from? Whether it's a window inside or out in the sun, turn your subject towards the light (unless you're in harsh lighting...in which I recommend the shade).
- Get in between your subject and the light. In the case of my self-portrait, I laid down in front of the window and held my camera up. The more directly your subject is turned toward the light source, the bigger and more defined your catchlights will be.
- When using a flash, bounce your light at a 45 degree angle behind you (towards a wall - that's not always a hard and fast rule...so be sure you practice this technique).
That's all I've got for now - I hope that was somewhat helpful. Be sure to swing by my blog when you have a chance for more photography and editing tutorials...as well as a bit of pure randomness. Have a great day!


That's great! I can't wait to try it out!
ReplyDeleteInteresting tip. I'll have to remember that. ;) Thanks!
ReplyDeletewonderful post. those cats are absolutely adorable- and I'm more of a dog person ;) thanks for the tip- i knew that natural light is the best but I was not aware of "catchlights"- i will try to use it next time :)
ReplyDelete♥flor
comment or follow at florecity.blogspot.com
;) Please visit-
ReplyDeletejemimabakytgul.blogspot.com!!!!